How to Uninstall Nvidia Drivers
It would be near impossible to run some of today’s most graphically intensive programs – such as online PC games – without a good graphics or video card.
Nvidia has been in the business for some time, and their graphics cards are widely used. As time goes on, these heavily-stacked GPU cards have become more powerful and feature-packed – thus requiring more advanced software and drivers.
At some point, the question of how to uninstall Nvidia drivers may arise.
There are various reasons you would want to remove the software that controls a graphics adapter. Perhaps you’re installing a newer device. Maybe the current one has stopped working or is causing some conflict.
Whatever the case, there are a couple of methods generally used to remove drivers and their associated software.
Some devices, such as Nvidia’s cards, have drivers that are packaged with other software (control panels and other application enhancements) that get installed.
In such scenarios, it’s wise to start by removing the device’s application packages – and determine if anything is left afterward.
Uninstall Nvidia Drivers from Windows
First, you’ll want to go into Window’s Program Manager. Type program into the search box on the taskbar and choose Add or remove programs.
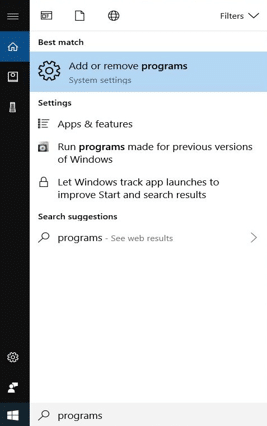
Click the Programs and Features then select the Nvidia application(s). You can click the Uninstall button from the top bar.
You can repeat the same steps for any other software Nvidia placed on your computer. Be sure and reboot the machine afterward.
Verify Drivers were Removed
After the Nvidia software is uninstalled, you may want to verify the drivers were removed as well. To do so, use the search box again to find and click on the Device Manager.
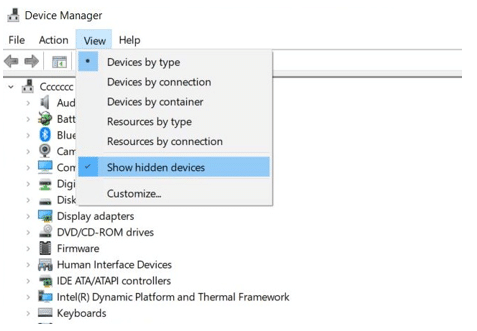
In Device Manager, click the View menus and check Show hidden devices.
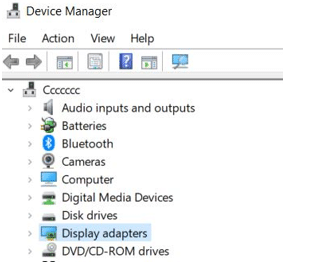
If you find that the Nvidia driver is still there, right-click and choose Uninstall. Otherwise, you’re good.
Cleaning up after Removal of Nvidia Driver
Typically, if Windows properly removed everything, you should be done. However, there are optional steps you can take to clean up residual items left by Nvidia.
You may want to do these steps if you feel some of the files or entries left behind are contributing to some issue.
Remove Residual Folders
From the windows search box on the taskbar, type File Explorer and click on the app that appears in the list.
You can choose the desired drive and click on the Program Files (or Program Data).
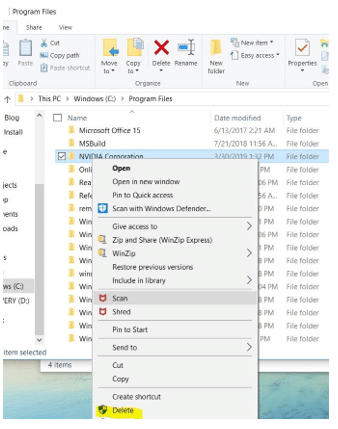
From here, you can delete the desired Nvidia folder(s).
Remove Orphaned Registry Entries
Sometimes software – when it’s removed doesn’t clean up the entries that were initially placed in the Windows registry. If these aren’t causing any issues – such as pointing to locations that no longer exist – then don’t worry.
However, if problems surface after the software’s removal, feel free to remove these entries. Before doing so, perform a backup of your registry in case something goes wrong.
Using the search box, type regedit and select the item that appears. Once the registry editor loads, you can right-click on any entry (such as HKEY_CURRENT_USER) and choose Find.
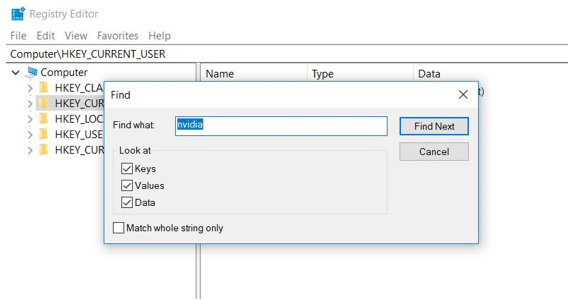
Type in Nvidia to locate any related entries. There may be other keys or values that need to be sought, but these can vary with different versions of the driver software.
Need for Keeping Device Drivers Updated
Whatever your reason for initially wanting to remove the Nvidia drivers, know that it’s a good practice to keep your computer’s device drivers up to date.
Numerous known issues have occurred due to corrupt, missing or outdated device drivers.
While there are several ways to update a driver, the most obvious is allowing Windows to try. Don’t be surprised if that doesn’t produce the best results.
If Windows doesn’t find and install the correct drivers, you may need to take a different approach.
Manually Updating Drivers
You can search the manufacturer’s website for the latest drivers. You’ll generally need the exact model (or serial number) to find it. Once you do, you can download and unzip the driver files.
Afterward, you can go into the Windows Device Manager (using the taskbar’s search box to find it) and locate your device in the list.
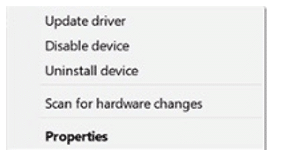
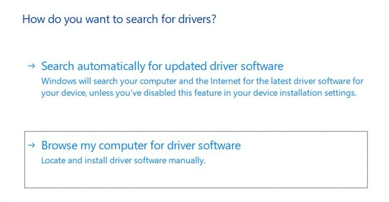
Two choices will appear. Select Browse my computer for driver software. This will take you to a window where you can browse for the downloaded driver.
Automated Approach to Nvidia Updates
Imagine an approach to keeping device drivers up to date that requires less effort on your part.
Software, such as Driver Support, can do the work for you. Taking the automated route can save you time and frustration. Such software works in the background and doesn’t require your input to do its job.
Automatic Download With Driver Support
Since 1996, Driver Support has been alleviating the pain involved in hunting for new drivers.
Driver Support software can inventory your computer for all supported devices. When fully registered it will update any drivers that are missing or out of date.
If you’re not too busy removing old drivers, you’ll have time to test that Nvidia graphics card on your new game.
Give DriverSupport | ONE a try today! to get started today.


